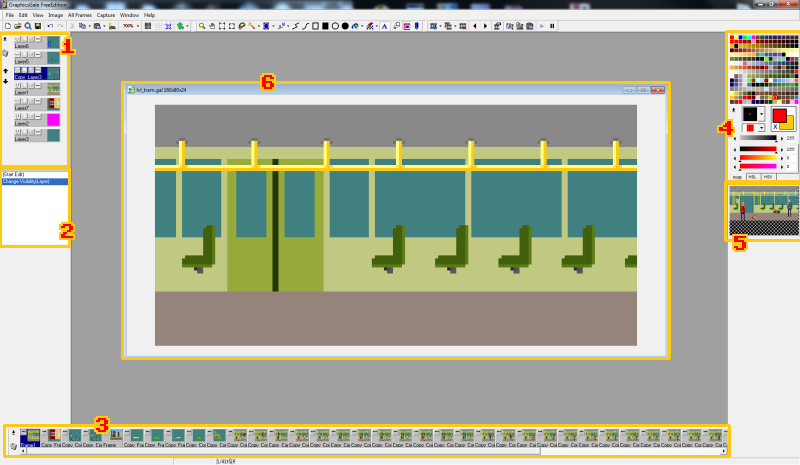
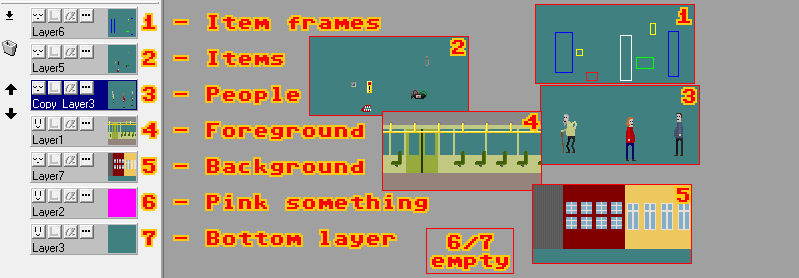
Magenta #ff00ff rgb(255,0,255)
-
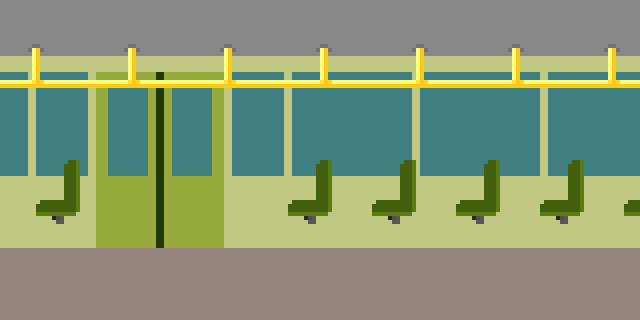
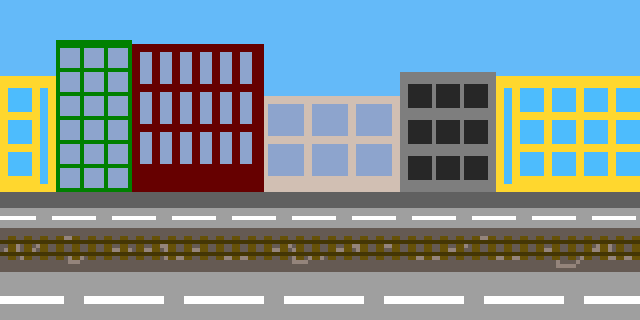
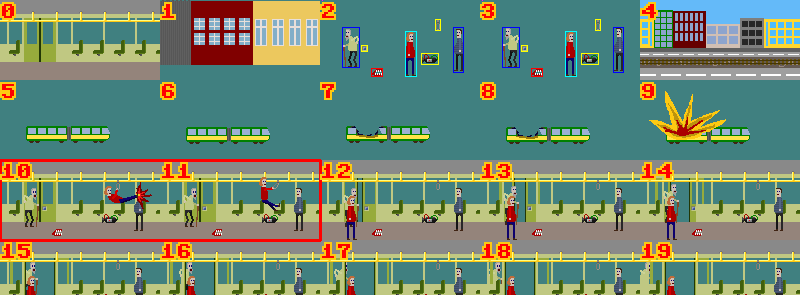
One pixel in this colour indicates the direction and speed of scrolling. In this instance, the background (from frame 1) will constantly scroll left. If you want to scroll it right, place it near the right edge of the screen. If you want to it to scroll up, place it on the left vertical edge near the top edge. if you want to scroll down, place it near the bottom edge. If you want it to look eye-bleedingly broken, place the dot near the center of the image.Yellow #ffff00 rgb(255,255,0)
-
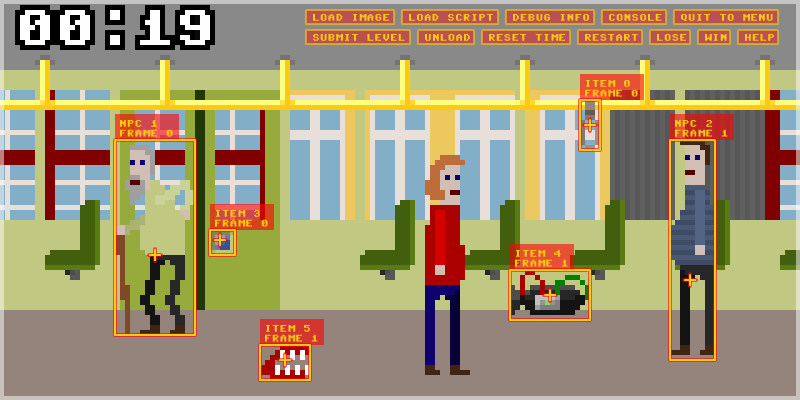
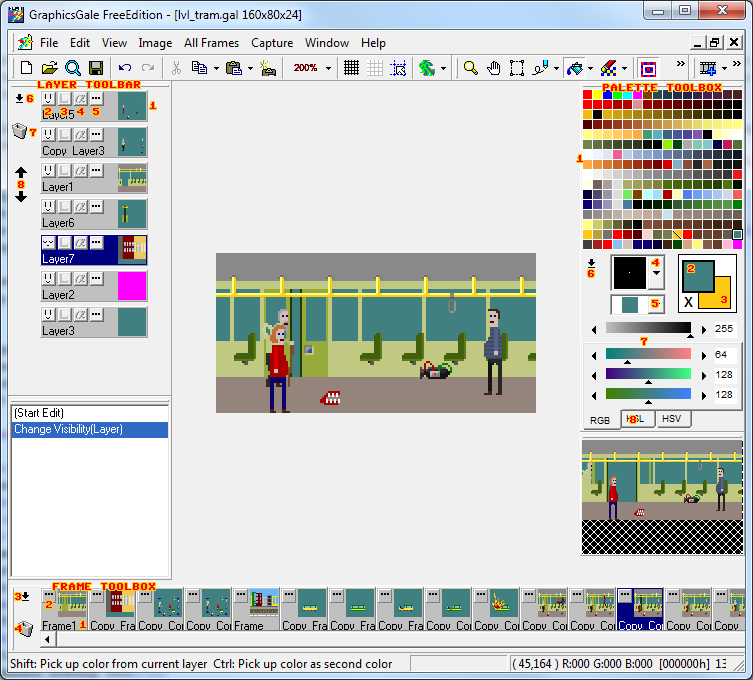
A box drawn in this colour around a graphic indicates an item. Everything inside excluding the frame will be converted to a separate sprite and used as an item. Yellow indicates a static item, one that you cannot grab and carry around. When interacting with this item McPixel will either grab it with hand or low-kick it depending on its position (explained later). There must be a 1 pixel gap between items, meaning that boxes cannot touch each other.Red #ff0000 rgb(255,0,0)
-
Red indicates a pickable item, one you can pick and carry around. The actions defined in the script can, and should be different depending whether McPixel is holding an item or not. There should be only one pickable item in a level for simplicity. Having more than one is not supported from the script, so that even if there are two, both will launch one action.Blue #0000ff rgb(0,0,255)
-
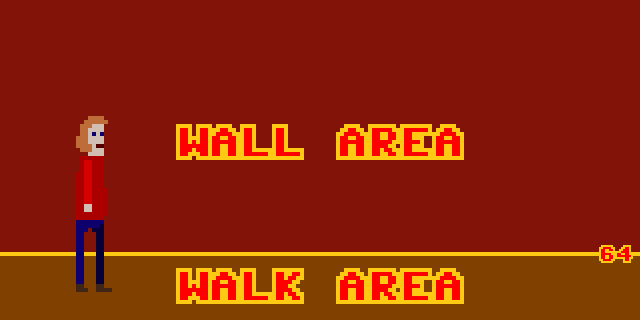
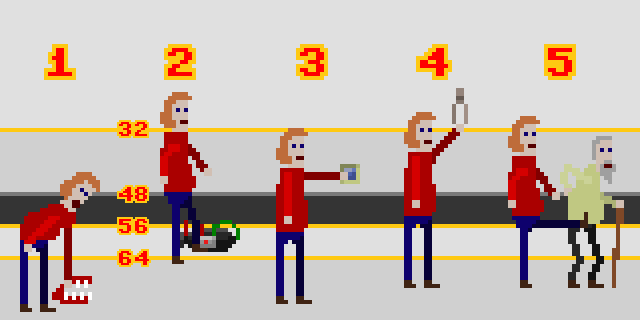
A man, or NPC if you want to put it that way. The only actual difference between static (yellow) items and NPCs is that default interaction with an NPC is kicking his balls. Feel free to abuse that and have McPixel kick balls of stuff other than people.Green #00ff00 rgb(0,255,0)
-
Green works the same way as yellow. The difference is that it indicates a background item. By default McPixel can go behind and in front of stuff depending on his position. however, if you use this colour, McPixel will always appear in front of this item. To see how it can be useful, take a look at The Space level example from the package. There is a floor latch boxed with yellow, which means McPixel can go behind the latch. Change it to green to see how it affects it! This is useless for stuff that is on the wall, since it will always be behind McPixel anyways.Cyan #00ffff rgb(0,255,255)
-
This indicates where McPixel is standing in the beginning. It is enough to have a cyan dot to indicate that, so feel free to do that if you lack free place on the level. However, I suppose it looks cleaner when you paste McPixel and box him with cyan.
These colours are exclusive for the purpose of describing level contents. So if you want to draw something yellow, use a nearby colour to do that (#fefe00 rgb(254,254,0)). This way it is almost unnoticable. Moreover, everyhting that is not framed, will be discarded, so that if you want to temporarily remove an item from the stage, it is enough to delete the frame surrounding it.